Table of Contents
- What are Xcode Cloud – Slack Notifications?
- Creating the Workflow
- Connecting Xcode with Slack
- Setup Slack Notifications with Post-Action
- Adding Xcode Cloud bot to Slack
- Setup Slack Notifications with Post-Action
Follow this tutorial on YouTube!
What is Xcode Cloud?
Xcode Cloud is Apple’s service that simplifies app development and enhances CI/CD. It seamlessly integrates with Xcode, offering automated testing and cloud-based build and distribution services. Developers benefit from improved productivity and efficient CI/CD workflows.
Today, we’ll be going over adding Slack Notifications to an existing Xcode Cloud workflow.
I highly recommend checking out this video, Intro to Xcode Cloud 2023 , to learn how to set up an Xcode Cloud Workflow with a sample project if you have not set one up previously.
What are Xcode Cloud – Slack Notifications?
Xcode Cloud Slack notifications allow us to receive real-time updates and notifications about the status of our Xcode Cloud Workflow. These include notifications for successful builds, test failures, and many other important events related to the app development process. This, in turn, informs our developers of any issues that may have happened during deployment as well as QA testers for when the build is ready to test straight from the chats that are used for your organization’s communication platform.
Xcode Cloud provides us an out-of-the-box solution that will help us get the workflow setup!
Let’s get started!
Xcode Cloud Workflow
The build configuration for Xcode Cloud is all through Xcode Cloud Workflows. The first step to setting up Slack Notifications is to add steps in the Xcode Cloud Workflow that will allow a notification to be sent to a specific Slack Channel.
- Open the Xcode Cloud Workflow Project that can be found here, or use one of your existing Xcode project in Xcode 15.0.
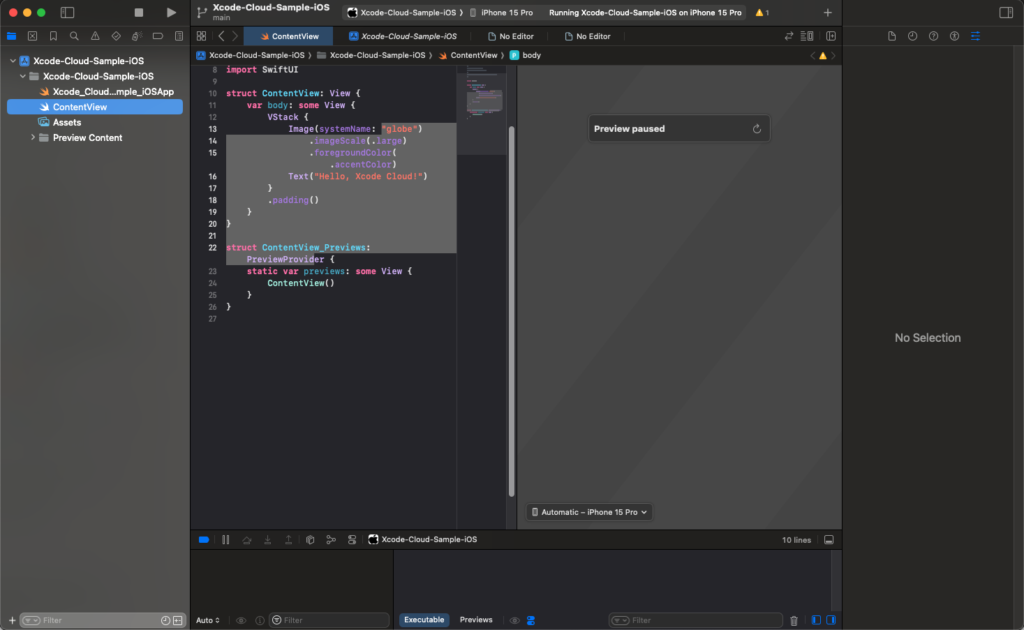
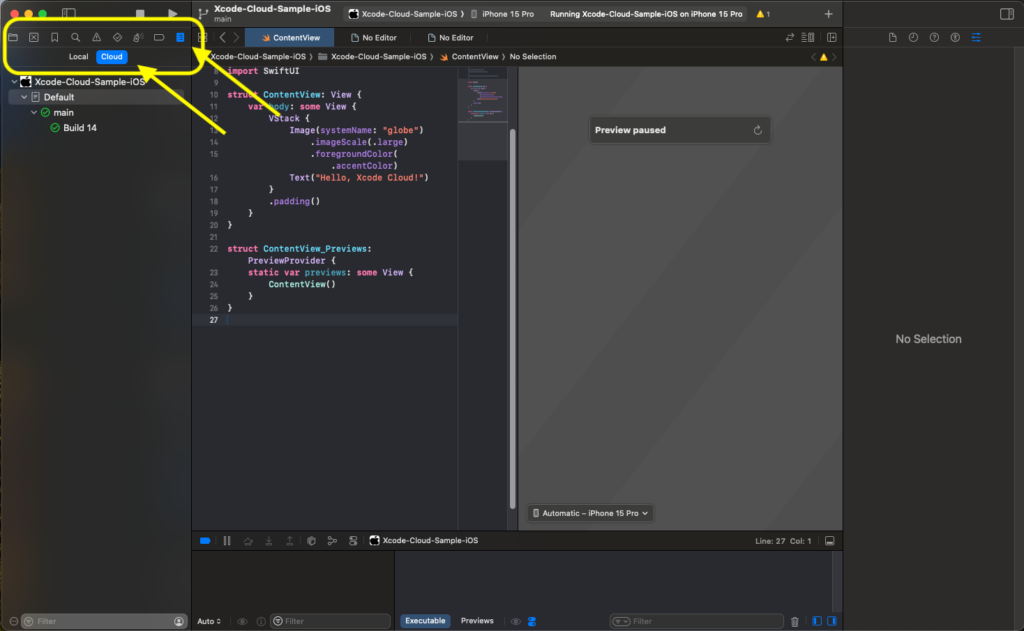
2. Once the project is open, navigate to the right most tab in the left menu column to see the Xcode Cloud and Local Build menu tabs.
If Xcode Cloud has not been setup, feel free to follow the guide mentioned earlier to set up the Default workflow and deployment.
Setup Slack Notifications on an Existing Workflow
Now, let’s set up Slack Notifications from an existing workflow.
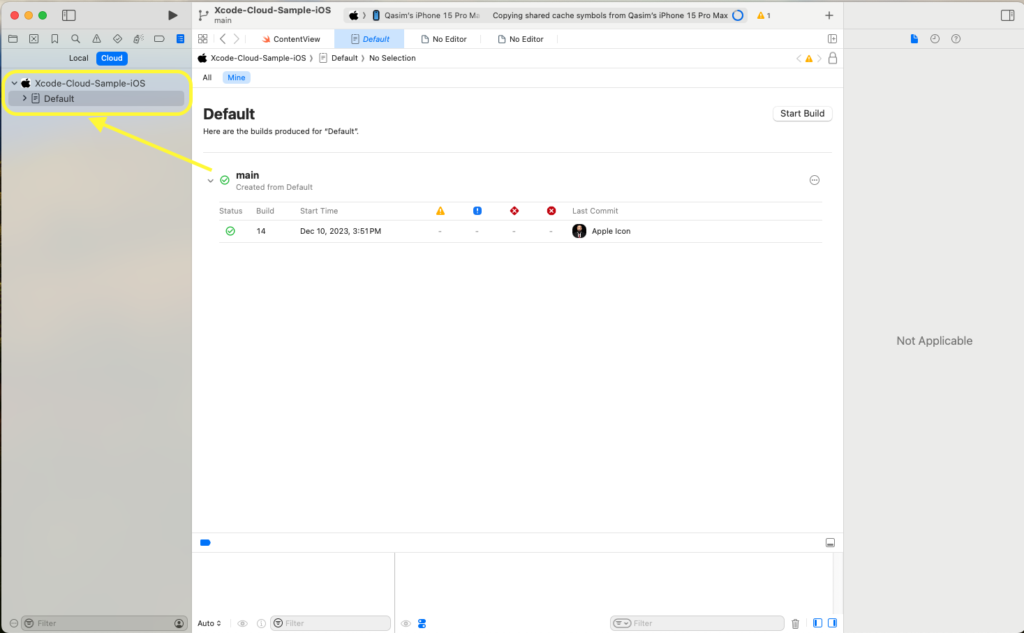
Here we have a Default Workflow that is building and deploying. We are going to add the Slack Notifications Post Action to this existing workflow.
- From the Navigator Menu on the left hand side, navigate to the Reports tab (the last tab), where you can access the Xcode Cloud Workflows that we set up in the previous section.
- Observe the Default workflow that is setup there. If the Default workflow hasn’t been set up yet, this article will walk you through setting up the Default workflow for building as well as pushing builds to Testflight for Internal Testing.
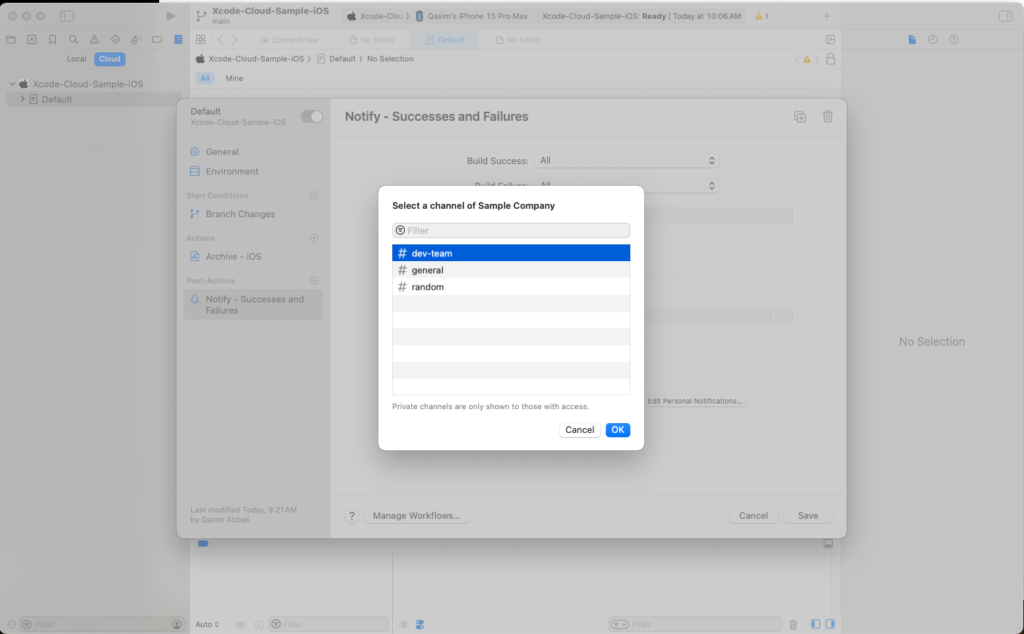
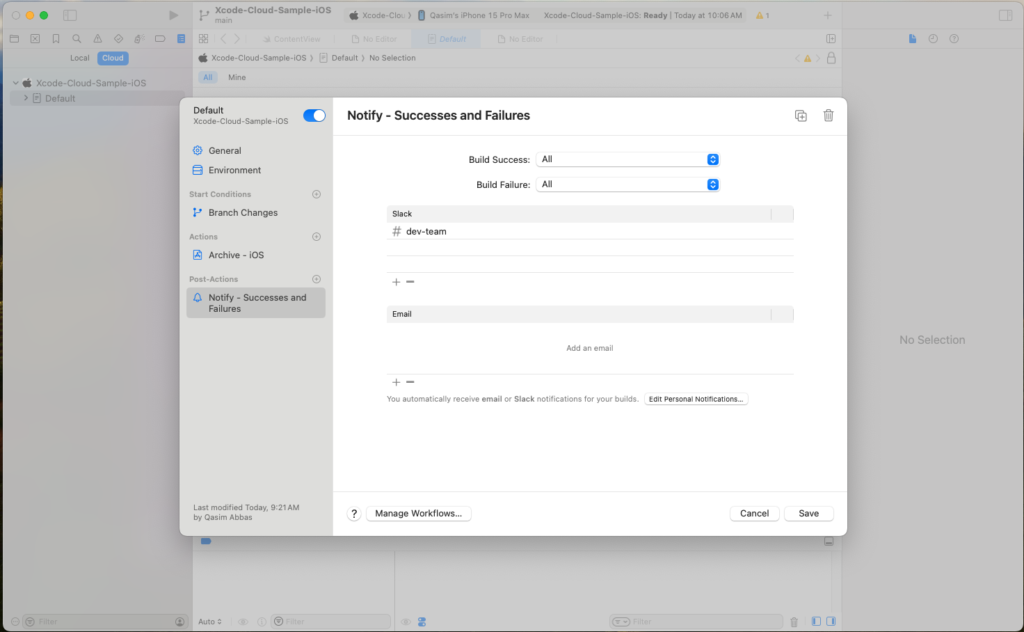
3. Right-Click and select “Edit Workflow”

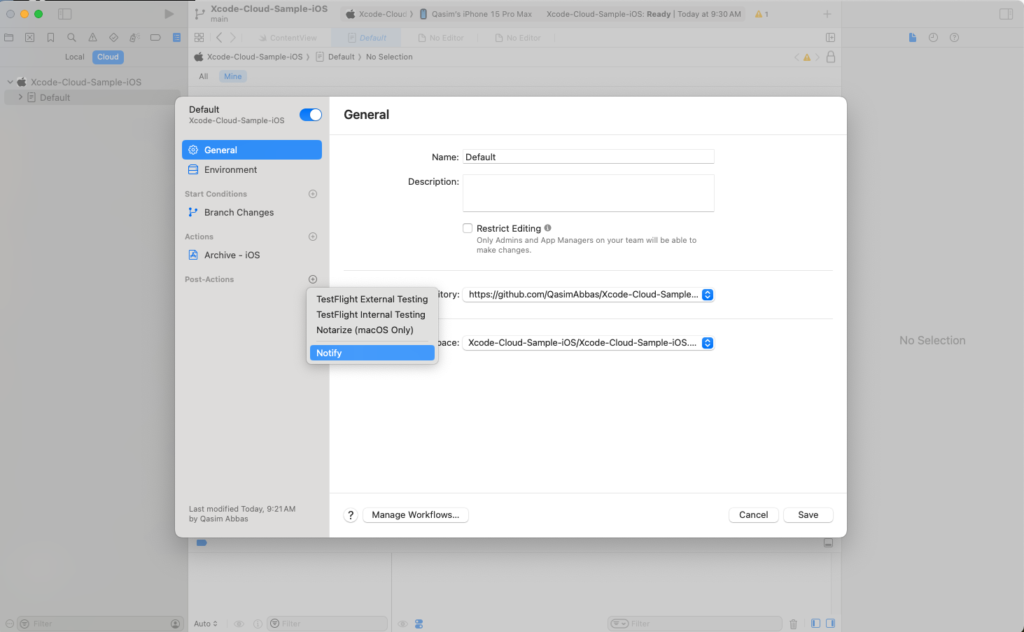
4. After the Post-Action has been created, we can see the Post-Action setup menu that allows us to customize the Post-Action Build event that the notification can be triggered on, as well as the system we would like the notification message to be sent to.
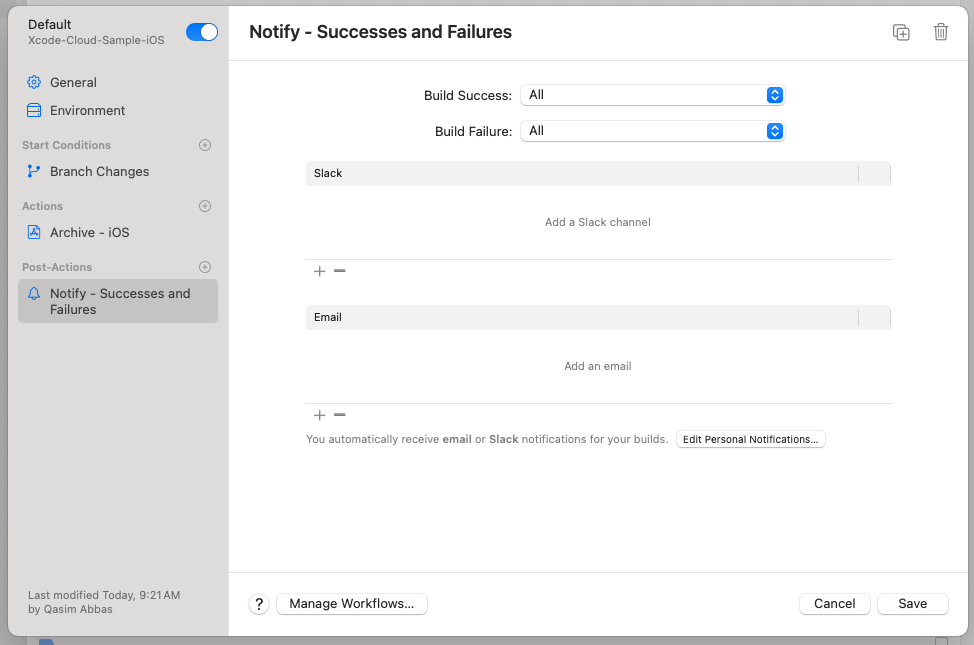
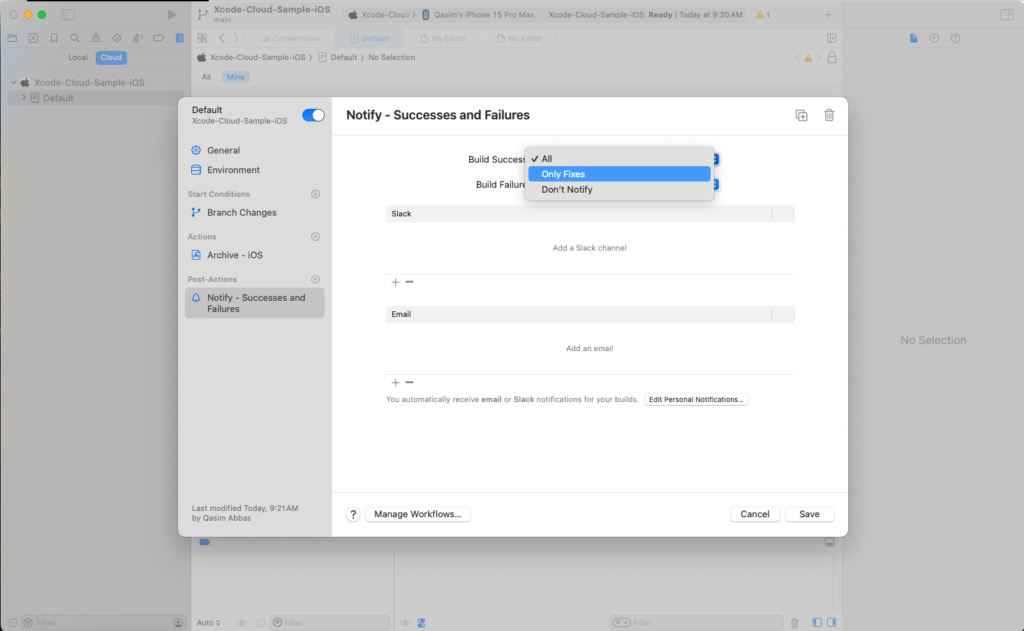
We can choose which events we would like the Post-Action to be triggered by from the drop-downs:
- Build Success
- Build Failure
By default they are selected for All but can be targeted for:
- All
- Only Fixes
- Don’t Notify
Connecting Xcode Cloud to Slack
Now let’s set up Slack Notifications for a new Xcode Cloud Workflow.
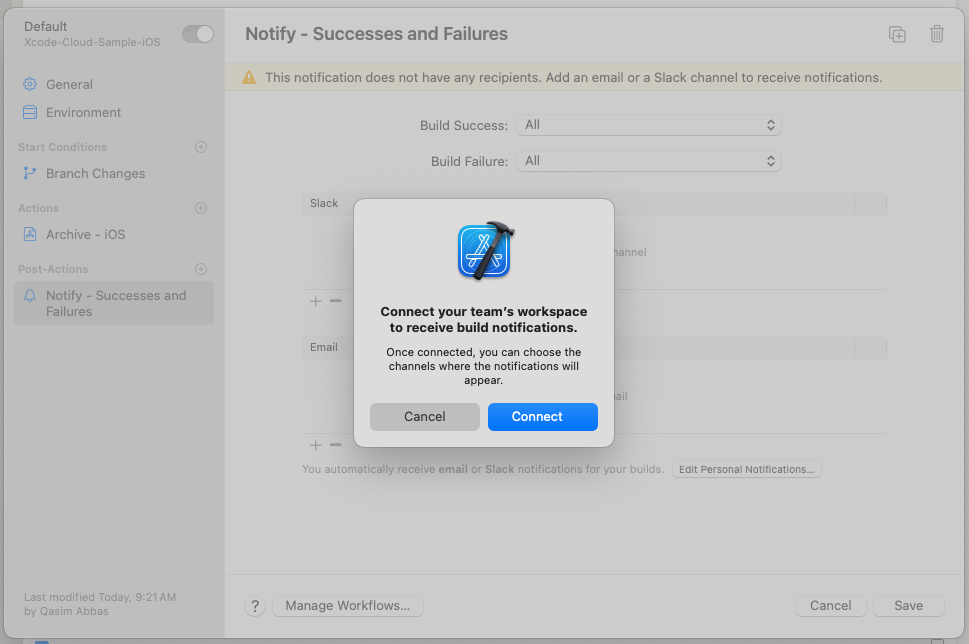
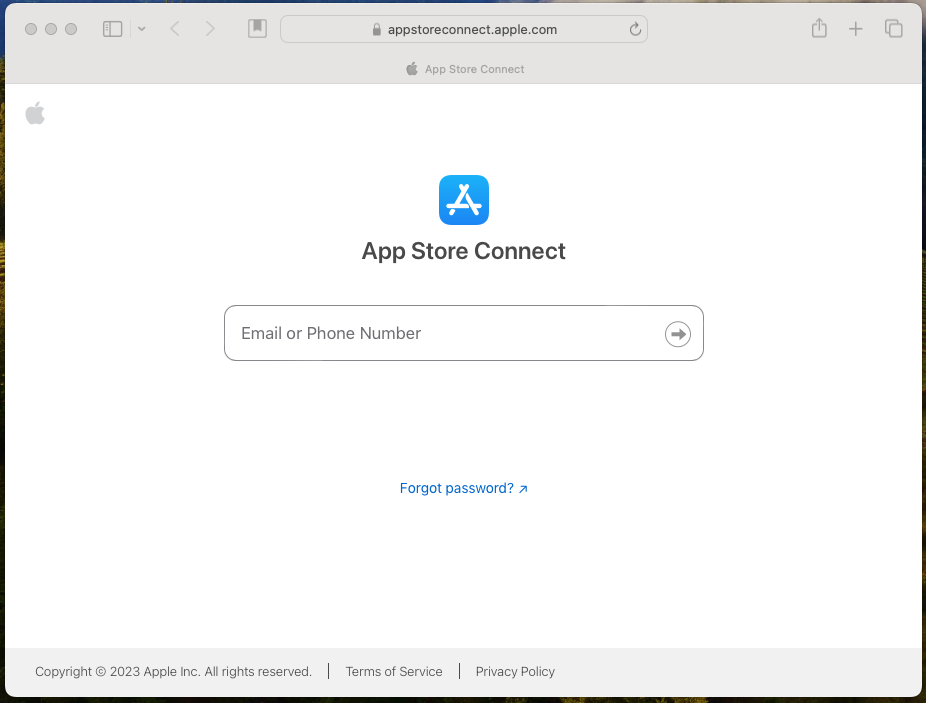
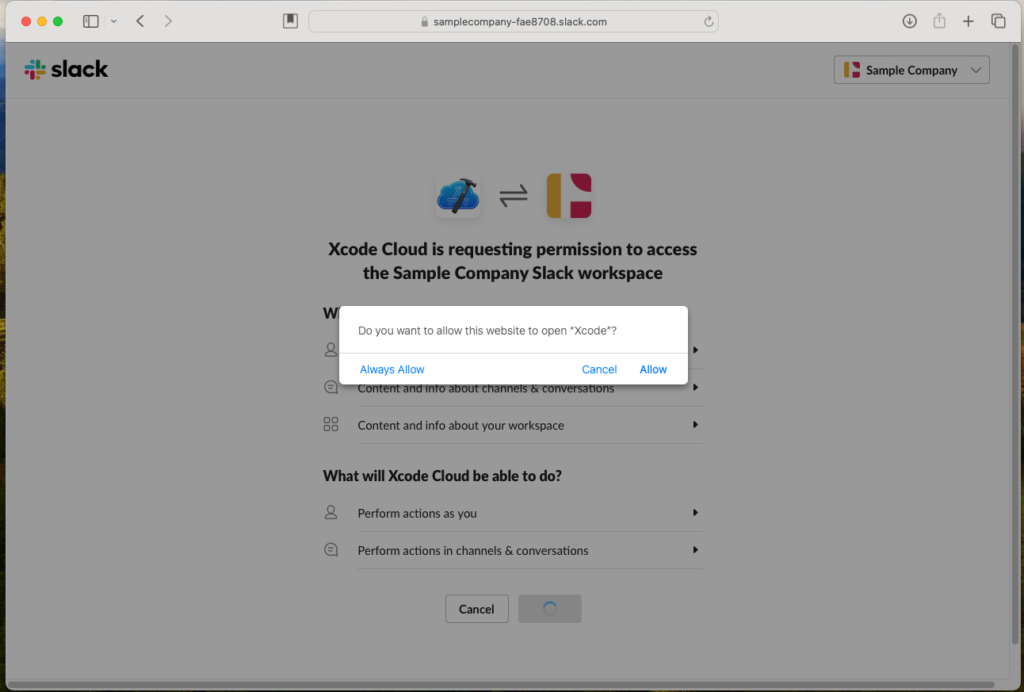
- Select “Connect” when prompted. After this, the Xcode Cloud + Slack Integration process should begin.
- An App Store Connect window will open prompting you to sign in.
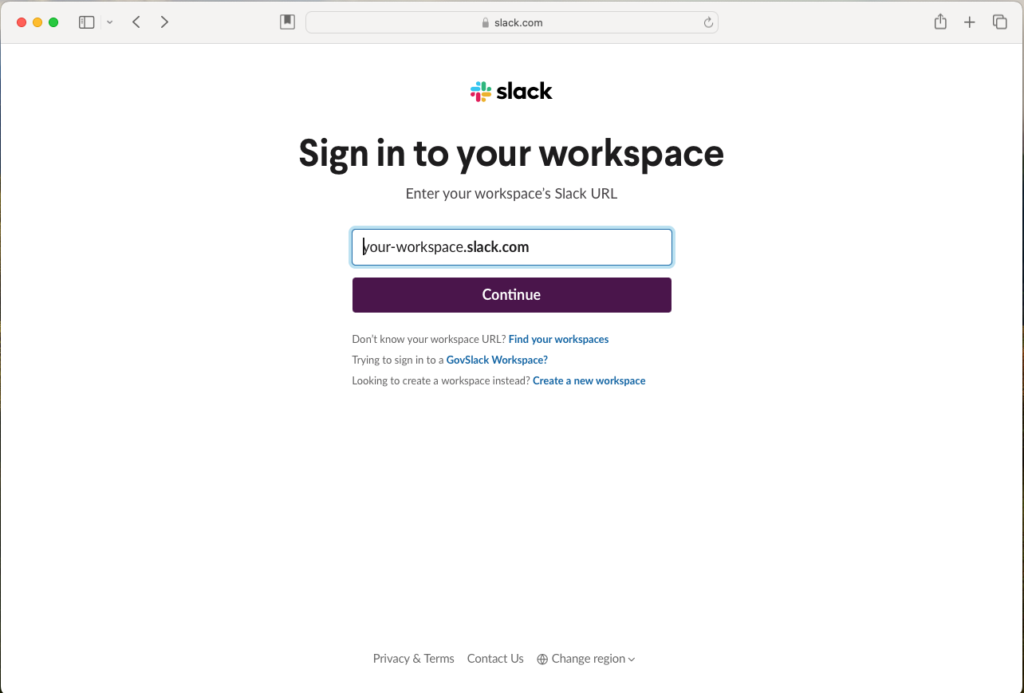
This can be done via Slack url or Find your workspace. Follow the Slack Sign In Flow until you are prompted to select the workspace you would like to connect

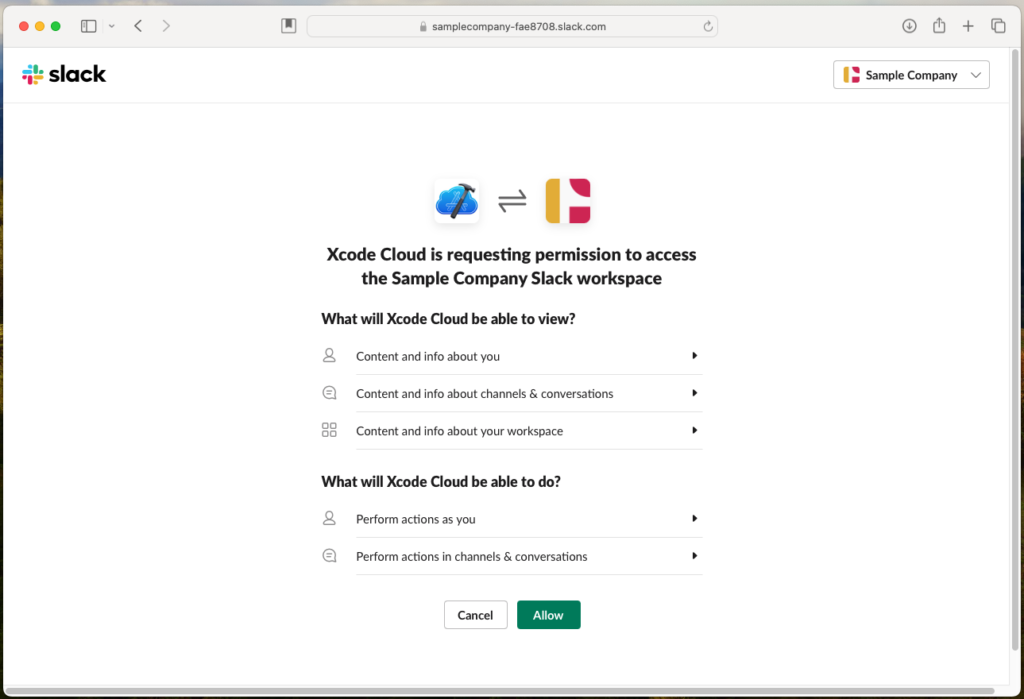
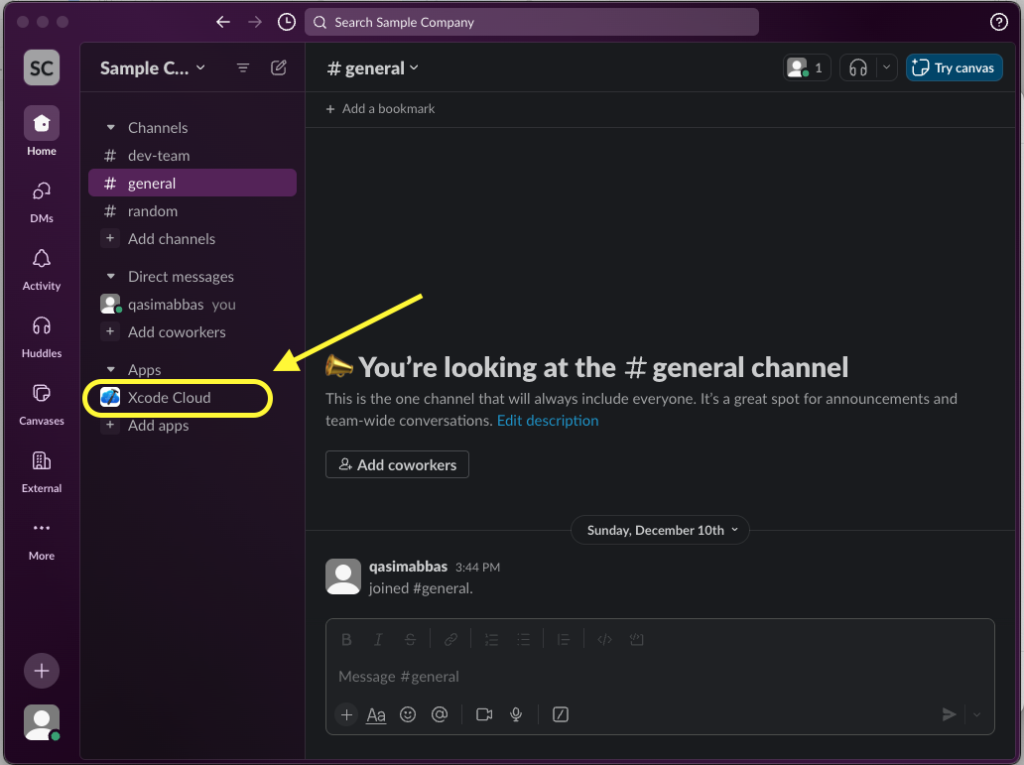
Back in Slack itself, you should be seeing a new app called Xcode Cloud. This is the app that will be delivering the notifications from Xcode Cloud to Slack.
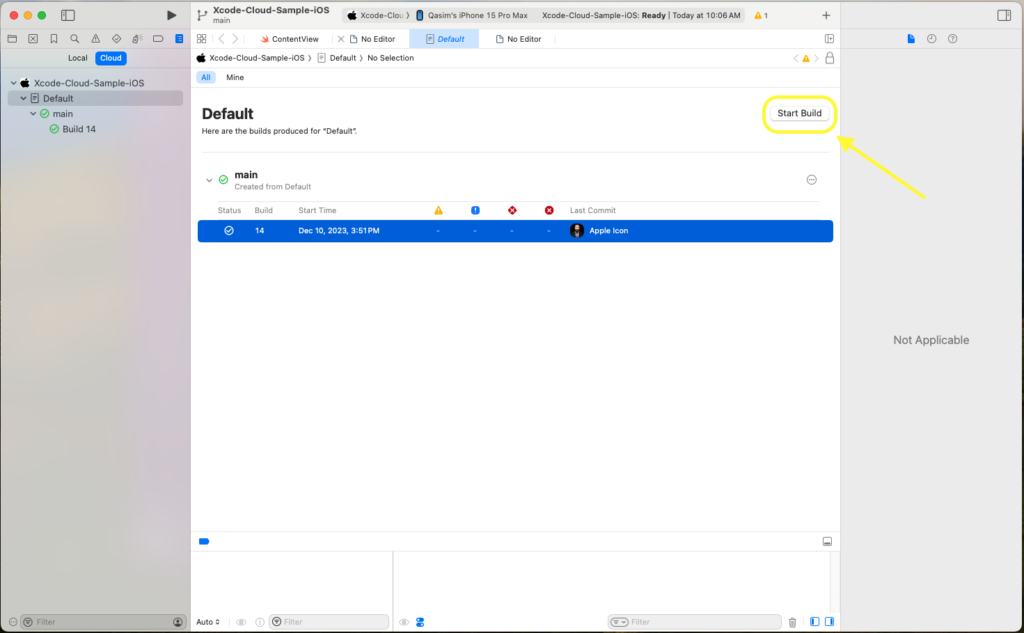
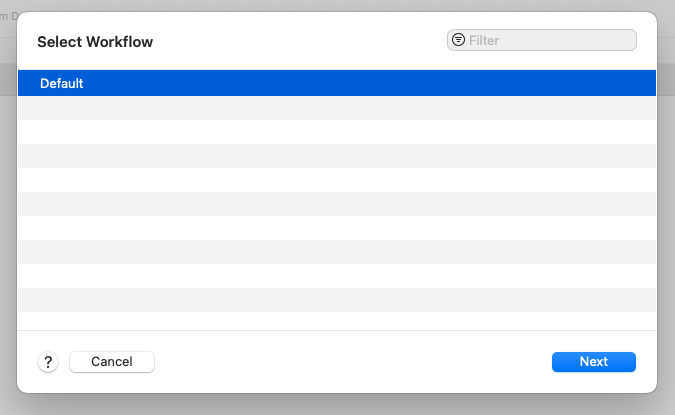
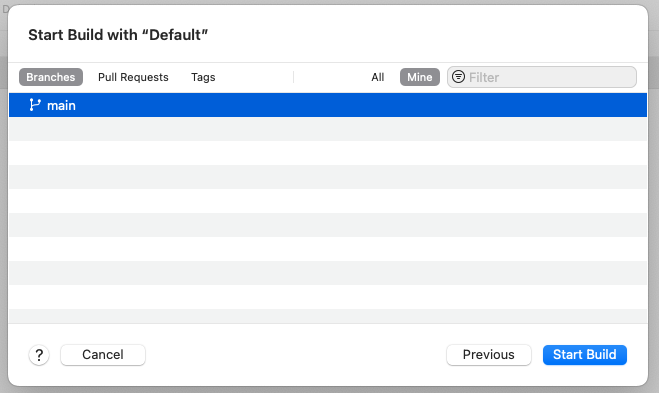
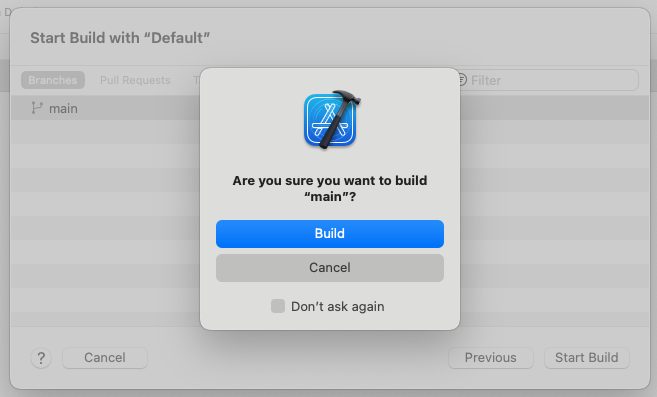
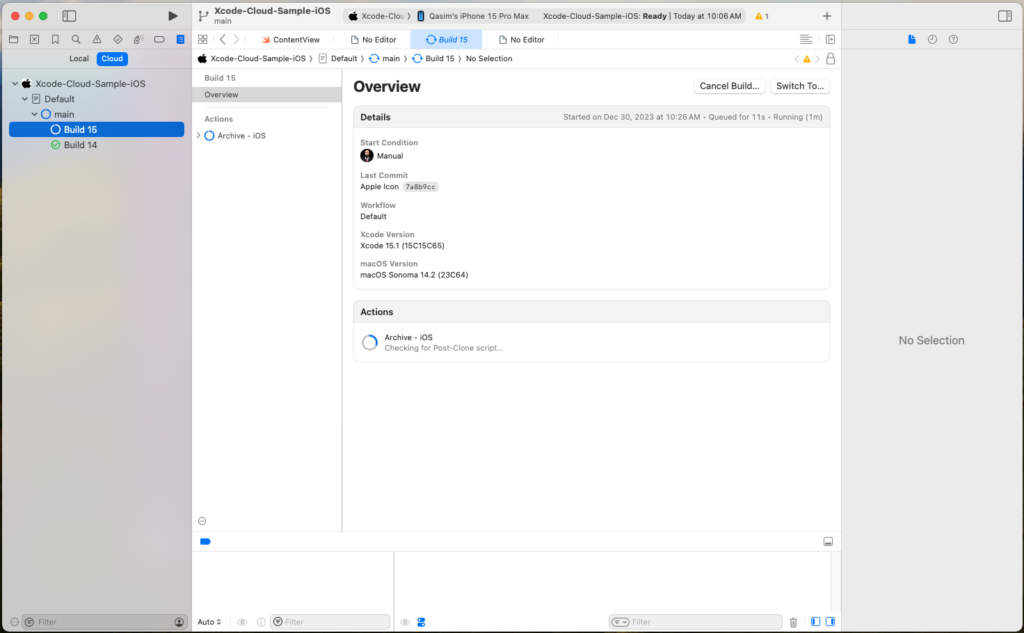
Our Workflow should be started now. We’ll have to wait until all steps are completed in the Workflow before proceeding further.
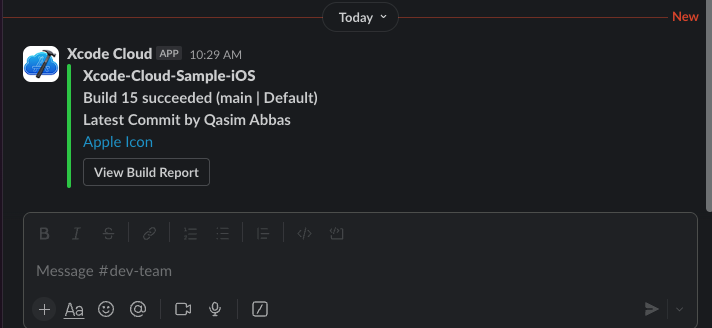
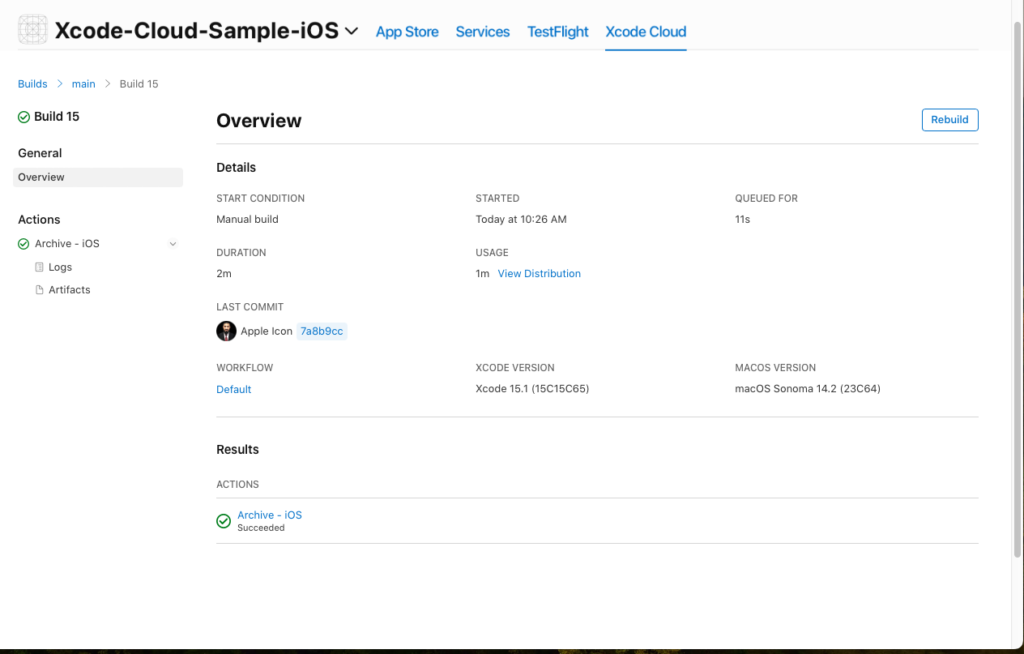
After the build succeeds and has been set up correctly, you should see a notification of the build! With the notification, there will be a button to View Build Report that will open in AppStore Connect to the Xcode Cloud Build Report.
You should have Slack Notifications fully hooked up now, increasing your team’s visibility of your app and build jobs, and saving countless hours in the process!