Table of Contents
-
-
Setting up GitHub Xcode Cloud
-
Setting up Xcode Project with GitHub
-
Adding App Icons to the Xcode Project
-
Creating an Xcode Cloud Workflow
-
Editing Xcode Cloud Workflow
-
Granting Access to Your Source Code
-
Create an App on App Store Connect
-
Editing the Workflow
-
-
Triggering Builds for Xcode Cloud
-
Manually Triggering Build
-
Create a Build From File Change
-
-
Follow this tutorial on YouTube!
Overview
We’ve seen CI/CD solutions with Jenkins, TravisCI, and CircleCI and many more, but Apple has now taken the approach to create their own CI/CD platform all integrated in Xcode called Xcode Cloud.
This tutorial covers setting up Xcode Cloud for App Store Deployment
What you’ll need for this tutorial:
-
-
App Icons – see this link: https://drive.google.com/drive/folders/1STOvd9uqPfO7hZGAT9EiOKREVts6nzF-?usp=sharing
-
Github Account
-
AppStoreConnect Account
-
Setting up GitHub Xcode Cloud
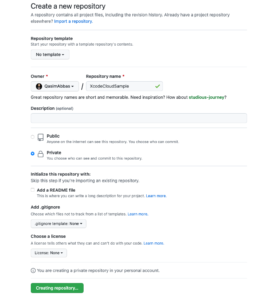
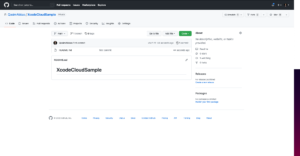
- Open Github in the browser and create a new GitHub Repo named “XcodeCloudSample”
 You will now have a new repository:
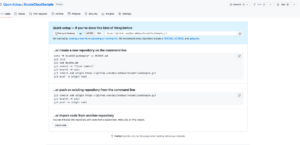
- Navigate to Documents folder, create a new folder called “XcodeCloudSample” and navigate inside.
- Create a new repository as per the instructions in GitHub.
- After following the instructions there should be a README.md file commit to your repo. This means your repo has been successfully setup and you are able to push to it.
Setting up the Xcode Project with Github
-
- Open Xcode and Create a new Xcode ProjectSelect iOS Platform and App
When the dialogue box pops up, enter the following information:Product name: “XcodeCloudSample”Team: the same team the AppStoreConnect Account is withInterface: SwiftUILanguage: Swift
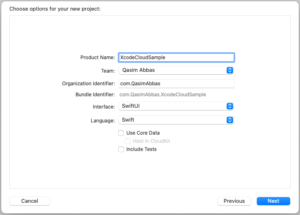
- Open Xcode and Create a new Xcode ProjectSelect iOS Platform and App
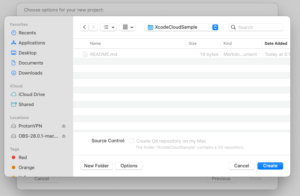
- Save in the “XcodeCloudSample” folder you had created and set up with GitHub.
 After a few seconds, the project should detect the GitHub Repo and you should see the main branch.
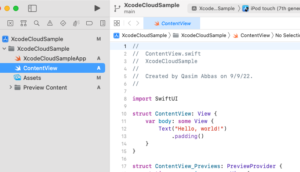
- Navigate in Xcode’s finder to Source Control>Commit
- Select all of the files to be committed
- Enter into commit the commit message: “First Project Commit”
- Check the box labeled Push to remote and then click Commit and Push
After a successful push you should see the XcodeCloudSample project in the GitHub Repo we had setup earlier. We are now setup with the Project and GitHub! The next step is to setup our AppStoreConnect App.

Adding App Icons to Xcode Project
The next step is to add the App Icons to the Xcode Project. We are not able to push apps to TestFlight without having app icons setup in the app.
- Download sample app icons here
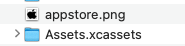
You should see two items:
-
-
-
- appstore.png
- Assets.xassets
-
-
-
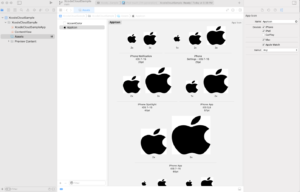
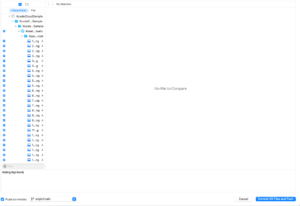
- Navigate to Assets in the Xcode Project “XcodeCloudSample”. There should be a dotted symbol and the field “AppIcon”. Delete this item in Xcode
- Navigate inside the folder Assets.xcassets that we downloaded, and drag the folder named Appicon.appiconset into the Xcode project. All the icons should now be imported
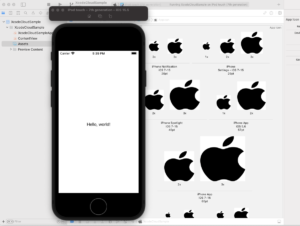
- Build and run the App once to make sure everything compiles with no issues.
- Commit these changes and push them to the GitHub repo
App Icons have been successfully been added
Next, let’s setup the Xcode Cloud Workflow
Creating an Xcode Cloud Workflow
A Workflow is basically the set of jobs and configuration that you would like to run for your project as part of the CI/CD process.
- Navigate to the last icon that shows our running tasks on the right column navigation bar in Xcode.
You should see two tabs here: Local and Cloud. Select Cloud
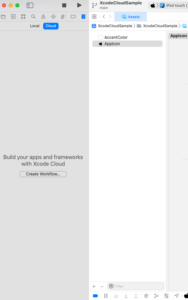
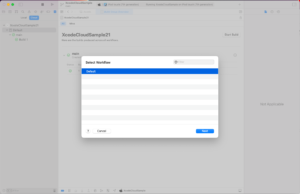
- Select Create a Workflow
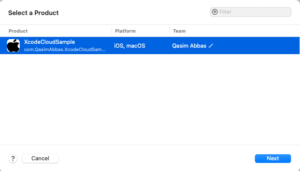
- A window should come up. Select the current project and continue.
A workflow has been created.
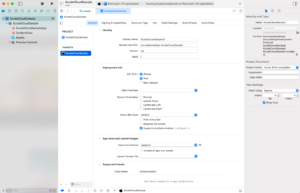
Editing Xcode Cloud Workflow
- Select Edit Workflow under Review Workflow
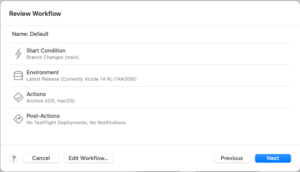
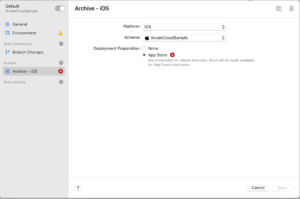
- Navigate to the Action Archive – macOS and remove it by clicking the trash can in the top right corner. Now the only action we have remaining is Archive – iOS
- Select App Store Deployment
- There are a few errors that will come up at this point. We will fix them by performing the following action:
Navigate to the Environment tab and check the Clean box
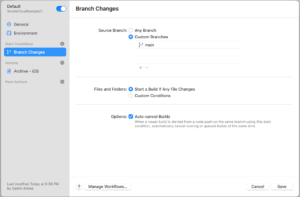
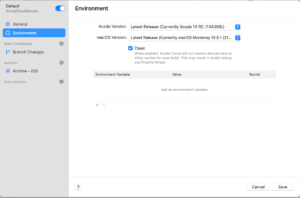 All errors should be resolved now.The Start Conditions tab is where the branch where the build of the project will happen. If we navigate there, we will see that the current selection is Start a Build If Any File Changes. We will leave this as is for now, but all of it is configurable.
 - Select Save. Now we are done with the Workflow configuration.
- Select Next. We should now be in a window for granting access to Source Code.
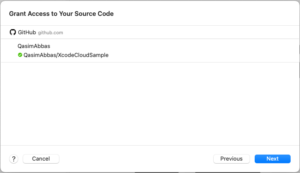
Granting Access to Github Source
If your Xcode is not connected to GitHub, you will be prompted to do so at this stage. Make sure that Xcode uses your GitHub personal access token. A great tutorial on how to create that that can be found here.
Once Xcode is connected to GitHub, you should see the repo selected automatically. Click Next.
Next, we will be creating the app on the AppStoreConnect Portal
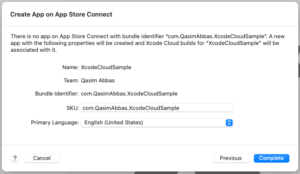
Create App on App Store Connect
- So far we haven’t touched the App Store connect portal, but luckily, this process is powerful enough to create it for us. Make sure your Xcode is connected with your AppStoreConnect Account at this stage as well. We will be using the default information that Xcode has provided in this step. Select Complete.
 You might see the following error after selecting Complete:
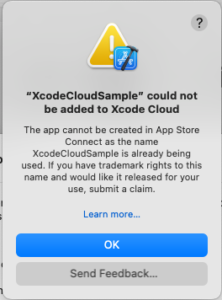
If so, perform the following steps:
-
-
- Cancel the current prompt and then navigate to the app’s target and change its name. I have named it “XcodeCloudSample21”. You can name it anything you want, it just has to be unique.
- Run through the steps of Edit Workflow again. (Github should already be set up.) Continue through until you are at the Create App screen. You should be able to see the updated AppName. Select Complete and the process should complete and be configured:
- Cancel the current prompt and then navigate to the app’s target and change its name. I have named it “XcodeCloudSample21”. You can name it anything you want, it just has to be unique.
-

-
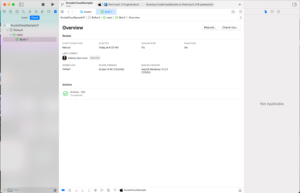
- Select Start Build and the build phase should begin. (You might have to wait a few seconds.)
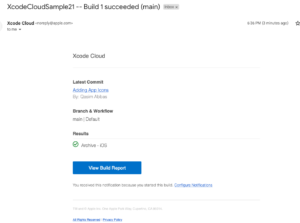
- After the build is done, there should be a green check that indicates the build has succeeded. You will also get an email.
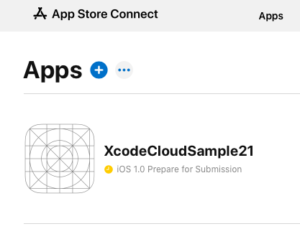
- Navigate to App Store Connect. You should be able to see the new app that was created from Xcode.
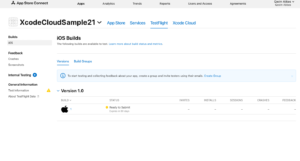
- Select the App and navigate to TestFlight
If you see a warning that says Missing Compliance, select Manage. The dialogue box below should pop up:
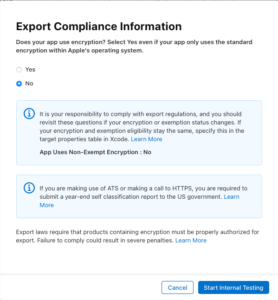
Under Export Compliance Information, select No and the click on Next. Then select Start Internal Testing
The build is now available for testing and for App Store Submission!
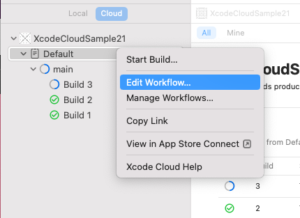
Editing the Workflow
After the Workflow is created, it can be edited by selecting Workflow and Right Clicking to see the options. Then select Edit Workflow from the menu.
Triggering Builds for Xcode Cloud
The way we have set up our file here, we can trigger it in two ways. The first way we will go over is Manual, and the second way through File Change.
Manually Triggering Build
- Navigate to the workflow in Xcode and select the Start Build Button. Right now we only see a Default workflow, but we are able to create different workflows as well. After selecting on a chosen workflow, it will use that workflow to build.
- Currently we only have one branch: main. We will select that to start the build on that branch. Select Start Build.
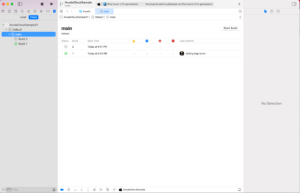
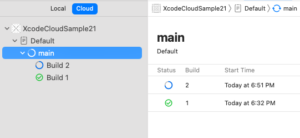
- Build 2 should now have started. You are able to see the progress by selecting main or Build 2 in the left bar.
The build has now successfully been triggered manually.
Note: The way the current workflow is set up, if another build is triggered while this build is still running, the current build will cancel, and the next build will start.
Create a Build From a File Change
In the Configuring a Workflow step, we have set up the project to create a build through a file change.
- Navigate to the File Browser on the left column in Xcode and select ContentView.
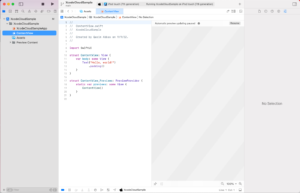
- Let’s do a minor text change and change the text from “Hello, World!” to “Hello, Xcode Cloud world!”

- Navigate to Source Control>Commit and commit this change with the message “Minor Text Change”
- Check Push to remote to the branch origin/main and then click Commit Files and Push
- Navigate to Workflow. You can see that Build 3 has been triggered automatically

From our current configuration, any changes to origin/main will trigger a new build to be created. This includes creating a Pull Request with another branch into origin/main. Once the Pull Request is merged, a new build will be created. We can edit the branch and any other configurations for start conditions by Editing Workflow>Start Conditions>Branch Changes
I hope this tutorial helped! Please feel free to comment on this article and reach out for any questions both on this guide and anything within the Mobile App Development realm! I’m super passionate and would love to chat with you.
Feel free to connect with me on LinkedIn as well at: in/qasim52